Count the shoes the cabinet must hold
Begin with the pairs that need to be reachable near the door: daily shoes, work shoes, weather footwear, or guest slippers. A cabinet’s advertised capacity may assume small, low-profile pairs arranged exactly as pictured. Boots, high-tops, wide shoes, and adult sizes take more space. Count the items you actually expect to store and compare their dimensions with the cabinet’s interior shelves.
Decide whether shoes will be stored in pairs, one pair per compartment, or tilted behind a drop-down door. Each layout uses space differently. A narrow cabinet can hold several pairs if the shelves are angled, yet those compartments may not fit bulky sneakers. Check whether the shelves are adjustable or removable and whether removing one leaves a practical space for boots.
Measure depth and door swing in the entry
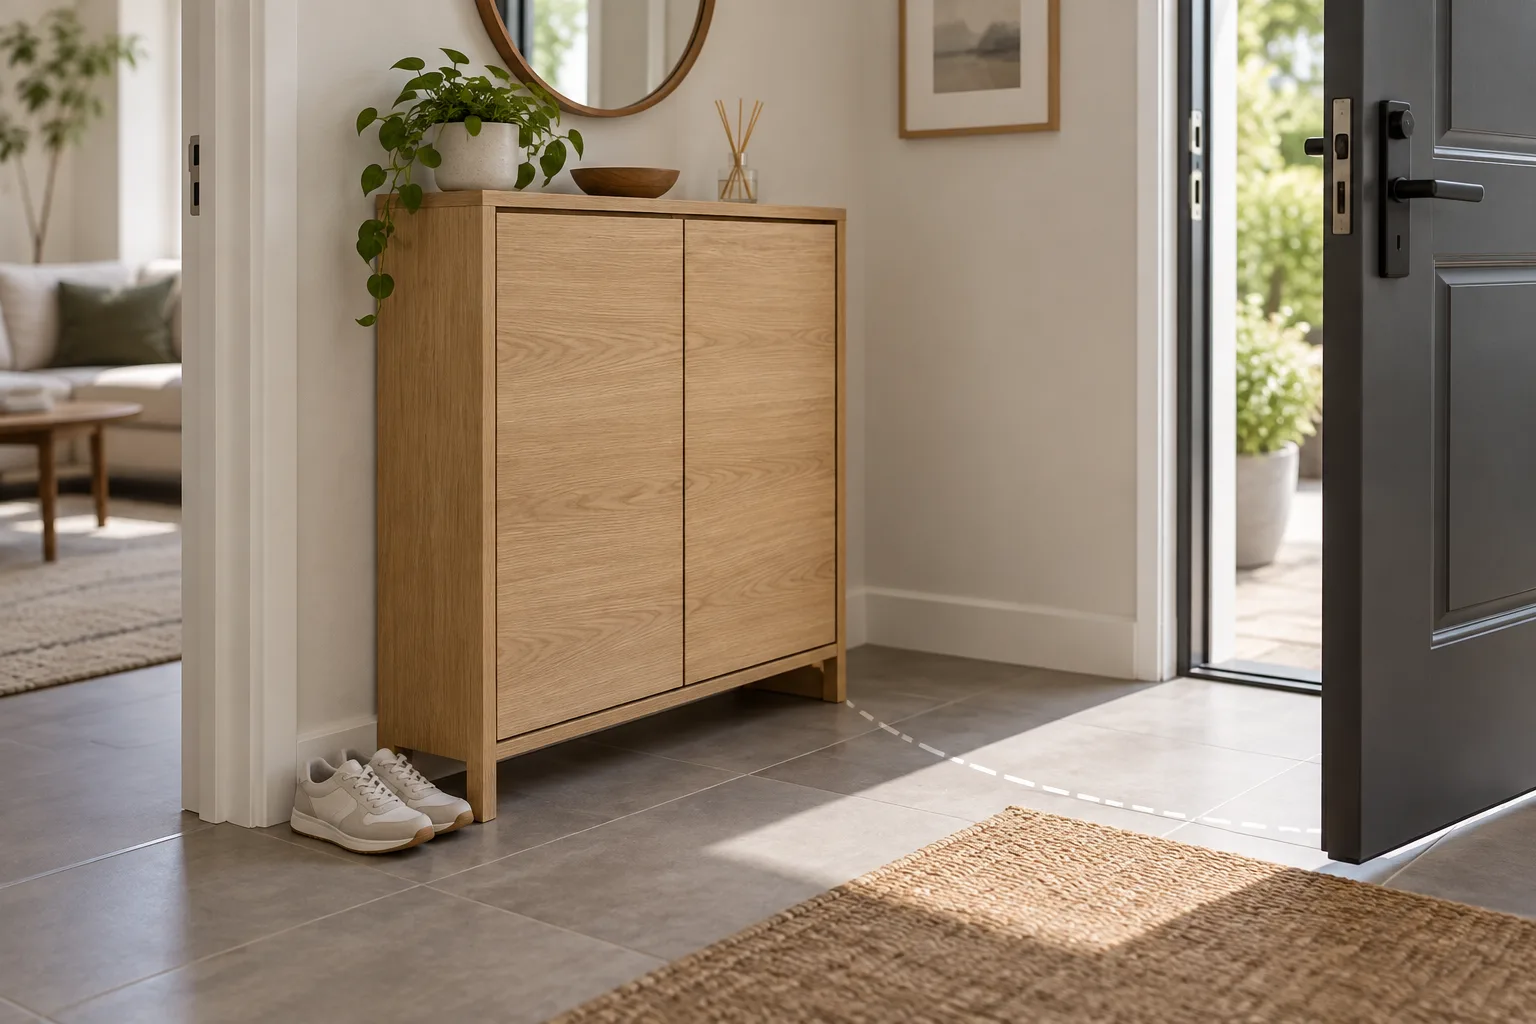
A slim cabinet can preserve floor space, but its depth must still accommodate the shoes. Measure the cabinet body, doors, knobs, and any overhang. Then mark the footprint near the wall and open the front door fully. The entry route should remain usable with the cabinet installed, especially when someone is carrying bags or when multiple people pass through at once.
Check the door swing and nearby trim. A cabinet door that opens into the front door, a bench, or a radiator can be frustrating every day. If the cabinet uses drop-down compartments, verify how far they project when open. Test the path with a tape outline and a cardboard template if the measurements are close. A little extra clearance can matter more than a higher stated shoe count.
Look inside the compartments
Interior dimensions are more useful than the exterior pair count. Measure the width and height of the opening and compare them with the tallest or widest shoes to store. Pay attention to toe shape and heel height, because a compartment can fit a flat shoe but not a raised heel. If the listing gives shelf spacing, check whether it can change without tools.
A drawer or top cubby may provide room for keys, gloves, or shoe-care items, but it can reduce the space available for footwear. Decide whether the extra storage solves a real entryway problem. Look at the interior finish and support points; a shelf that flexes under footwear may not remain aligned. For families, consider whether the compartments are intuitive enough that everyone will return shoes to the right place.
Consider airflow and cleaning
Shoes can bring dust and moisture into a closed cabinet. Slatted doors, ventilation gaps, or an open back may allow more airflow than a sealed front, though the exact effect depends on room conditions and how damp the footwear is. Let wet shoes dry before storing them and follow any product guidance about moisture. A cabinet should not be treated as a substitute for drying footwear after rain.
Check whether shelves can be removed or wiped down. A removable tray makes it easier to clean grit and debris, while a fixed angled compartment may need a cloth that can reach around corners. The entry is a high-contact area, so choose a finish that can be cleaned with methods allowed by the manufacturer. Avoid strong cleaners on an unknown laminate or veneer.
Match material and appearance to the home
Wood-look cabinets, painted finishes, and metal frames create different visual weight. A pale finish can blend with light walls; a darker cabinet can ground the entry but make a narrow hall feel more crowded. Compare the cabinet color to nearby trim and flooring in natural light. Product screens can shift undertones, so review multiple photos or request a sample if the retailer offers one.
The top surface may become a landing area for mail, bags, or a small lamp. Confirm that it is deep and stable enough for the items you intend to place there. If you need a seat for putting on shoes, a shoe cabinet alone may not serve that purpose; pair it with a separate bench only if the layout has room. Keep decorative styling secondary to the storage and walking route.
Review anchoring and assembly requirements
Tall or narrow storage furniture may require wall attachment according to the manufacturer’s instructions. Review the included anti-tip hardware and the CPSC’s Anchor It furniture-safety information before installation. Use the supplied hardware appropriate to the wall type and follow the product manual. Do not rely on placing heavy objects on top to stabilize a cabinet.
Check the package size, assembly steps, tools, and whether two people are recommended. Confirm that the cabinet can pass through the doorway and turn in the hallway before delivery. After assembly, test the doors and shelves while the cabinet is empty, then secure it as instructed. Report damage promptly and keep packaging until the cabinet is checked.
Choose capacity without crowding the doorway
Before checkout, confirm the number of included shelves, interior measurements, usable capacity for your footwear, door clearance, stability instructions, delivery, and return policy. Verify that the product listing describes the selected color and size. If you cannot confirm whether your largest shoes fit, ask the retailer before ordering rather than relying on a generic capacity figure.
An entryway shoe cabinet succeeds when the right shoes fit, the doors open fully, and the route through the home stays clear. A slimmer cabinet with honest capacity may be more useful than a wide unit that obstructs the door. Measure the space, test the footprint, and choose a layout your household will actually use.